Create Custom Portrait and Landscape Certificates
Fri 22nd Dec 2017< Back to Blogs and Tutorials
Create customized Certificates with ClassMarker’s Quiz Certificate Maker. Create one or several different Certificates. Apply the same one across multiple Tests or add a different one for each Test.With the certificate editor, options include:
- Portrait and Landscape Certificates
- Drag and Drop text and images anywhere on certificate
- Multiple font styles and sizes
- A4 and letter size
- Adding additional text and images
- Uploading custom backgrounds
- Create Wallet sized Certificates
- Dynamically include Test taker Name, Test name, Test score and the Date
- Select different date display formats
Download our PDF Certificate design manual to send to your web designer which contains instructions on creating a custom background image for your Certificate.
How to Customize Quiz Certificates with ClassMarker:
See: How to Customize Quiz Certificates
- From your Dashboard, click on Certificates.
- Select ‘New Certificate’
- Name certificate - Give any name to your certificate. Test takers will not see this name, it is only used as reference. There is a 30 character limit.
- Add customization options
- Save and Preview
Now, let’s go through the options for customizating a Certificate.
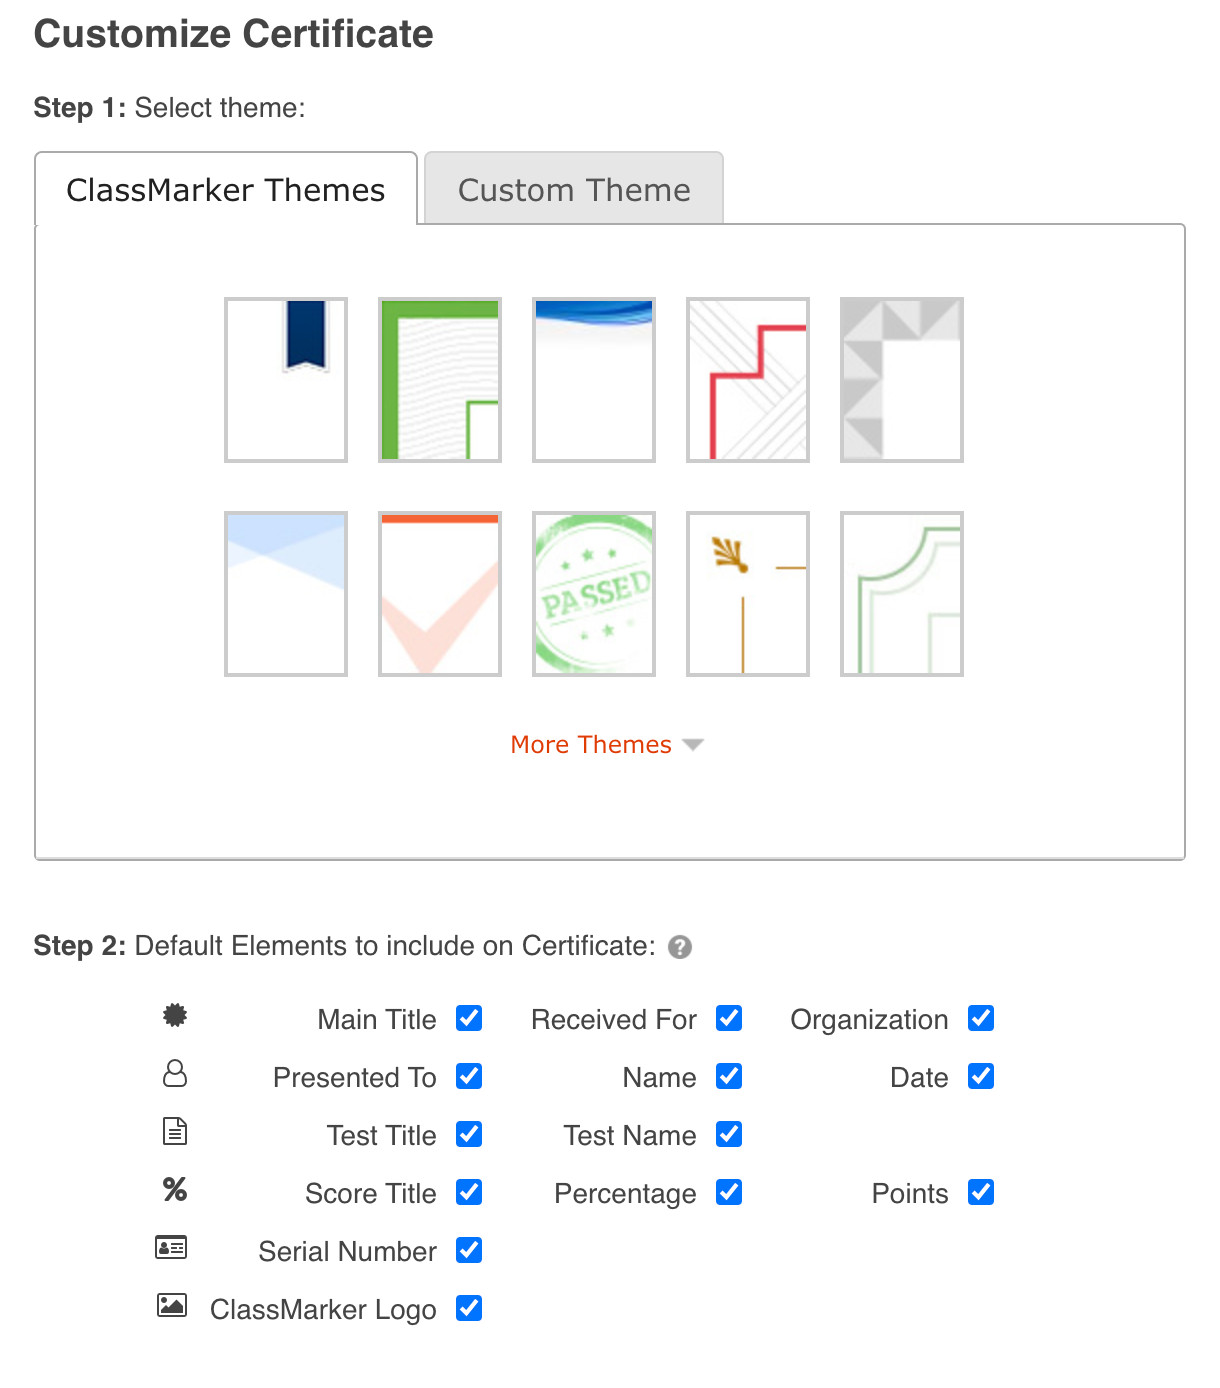
Step 1: Select Theme
- Click on the ‘Custom Theme’ tab
- Select Background: Click to add an already existing file ‘From My Files’ or ‘Upload’ to add an image from your computer.
FYI: There are two tabs - ClassMarker themes and Custom theme.
With the ClassMarker theme, you still have all of the options of selecting the elements you want displayed, etc., however you would choose one of ClassMarker’s 60 pre-made background images. With Custom theme, you can upload your own background images.
Background images are positioned from the top left of the certificate.
Background Image Requirements:
A4 Portrait:
1. Image Width: 760px
2. Image Height: 1075px
3. Image file size: under 200kb
4. Format: .jpg or .png
A4 Landscape:
1. Image Width: 1075px
2. Image Height: 760px
3. Image file size: under 200kb
4. Format: .jpg or .png
Letter Portrait:
1. Image Width: 760px
2. Image Height: 984px
3. Image file size: under 200kb
4. Format: .jpg or .png
Letter Landscape:
1. Image Width: 984px
2. Image Height: 760px
3. Image file size: under 200kb
4. Format: .jpg or .png
Tip 1: If adding text to your background image, you can remove some or all of the text appearing in the certificate when editing. Remove text boxes by clicking on the red ‘x’ for each one.
Tip 2: Dynamically added text such as Names, Scores and Dates will be added to the certificate automatically by ClassMarker. You can however, choose to customize the style of this text when creating/editing the certificate. Simply click on any of the text and the text editor will open.
Tip 3: Adding a signature to the certificate can be accomplished by adding this to your background image, prior to uploading it.
Tip 4: Wallet Size Certificates - Upload a business card or other small wallet sized background image. You can then drag the text elements onto the background image. Clicking on the test elements will pop open the text editor in order to then reduce the text size. Test takers can then download, print and cut out their certificate to have on hand. Having the wallet size certificates feature is a great option, for anyone who needs to show proof of certification, regardless of where they are. View our many Online Testing Features.
Step 2: Default Elements To Include On Certificate
- Main Title (EG: Certificate of achievement)
- Received For (EG: For passing the ‘Health and Safety Course’)
- Organization (EG: Details such as company name, address)
- Presented To (EG: Text introducing who the Test is being presented/awarded to)
- Name (Name of Test taker will be added automatically)
- Date (Date will be added automatically)
- Test Title (Test title can be placed before Test name)
- Test Name (Test name is automatically added)
- Score Title (EG: Percentage Achieved: / Score Received)
- Percentage (Percentage is automatically added)
- Points (Points are automatically added)
- ClassMarker Logo (Can remove by clicking on red ‘x’ over element)
Tip 1: Change the text style for any element, including those that, if chosen will be added automatically. Click on any of these to expand the text editor for each item.
Tip 2: Change date format by clicking on date element in certificate. When the text editor opens, choose from one of the various date formats, by selecting this from the drop down.
Step 3: add Extra Elements
- Add New Text Field: When clicking to add a new text field, you will easily see where this is as it will be highlighted in yellow. Then customize text and drag and drop anywhere on the page.
- Add Image / Logo: This will open up the file window, giving the option to add from existing uploaded files or upload a new one from your computer.
- Add Horizontal Line: Clicking on this will add the horizontal line, in which you can then drag and drop to where required.
All elements within the certificates (additional images, all text) can be easily moved, using ClassMarker's drag and drop certficate maker for online quizzes.
Step 4: select Orientation And Page Size
Select the size and either portrait or landscape mode for quiz certificates, from the drop-down. The following size specifications are listed above, however we have also included them here for quick reference.
A4 Portrait
Image Width: 760px / Image Height: 1075px
Image file size: under 200kb / Format: .jpg or .png
A4 Landscape:
Image Width: 1075px / Image Height: 760px
Image file size: under 200kb / Format: .jpg or .png
Letter Portrait:
Image Width: 760px / Image Height: 984px
Image file size: under 200kb / Format: .jpg or .png
Letter Landscape:
Image Width: 984px / Image Height: 760px
Image file size: under 200kb / Format: .jpg or .png
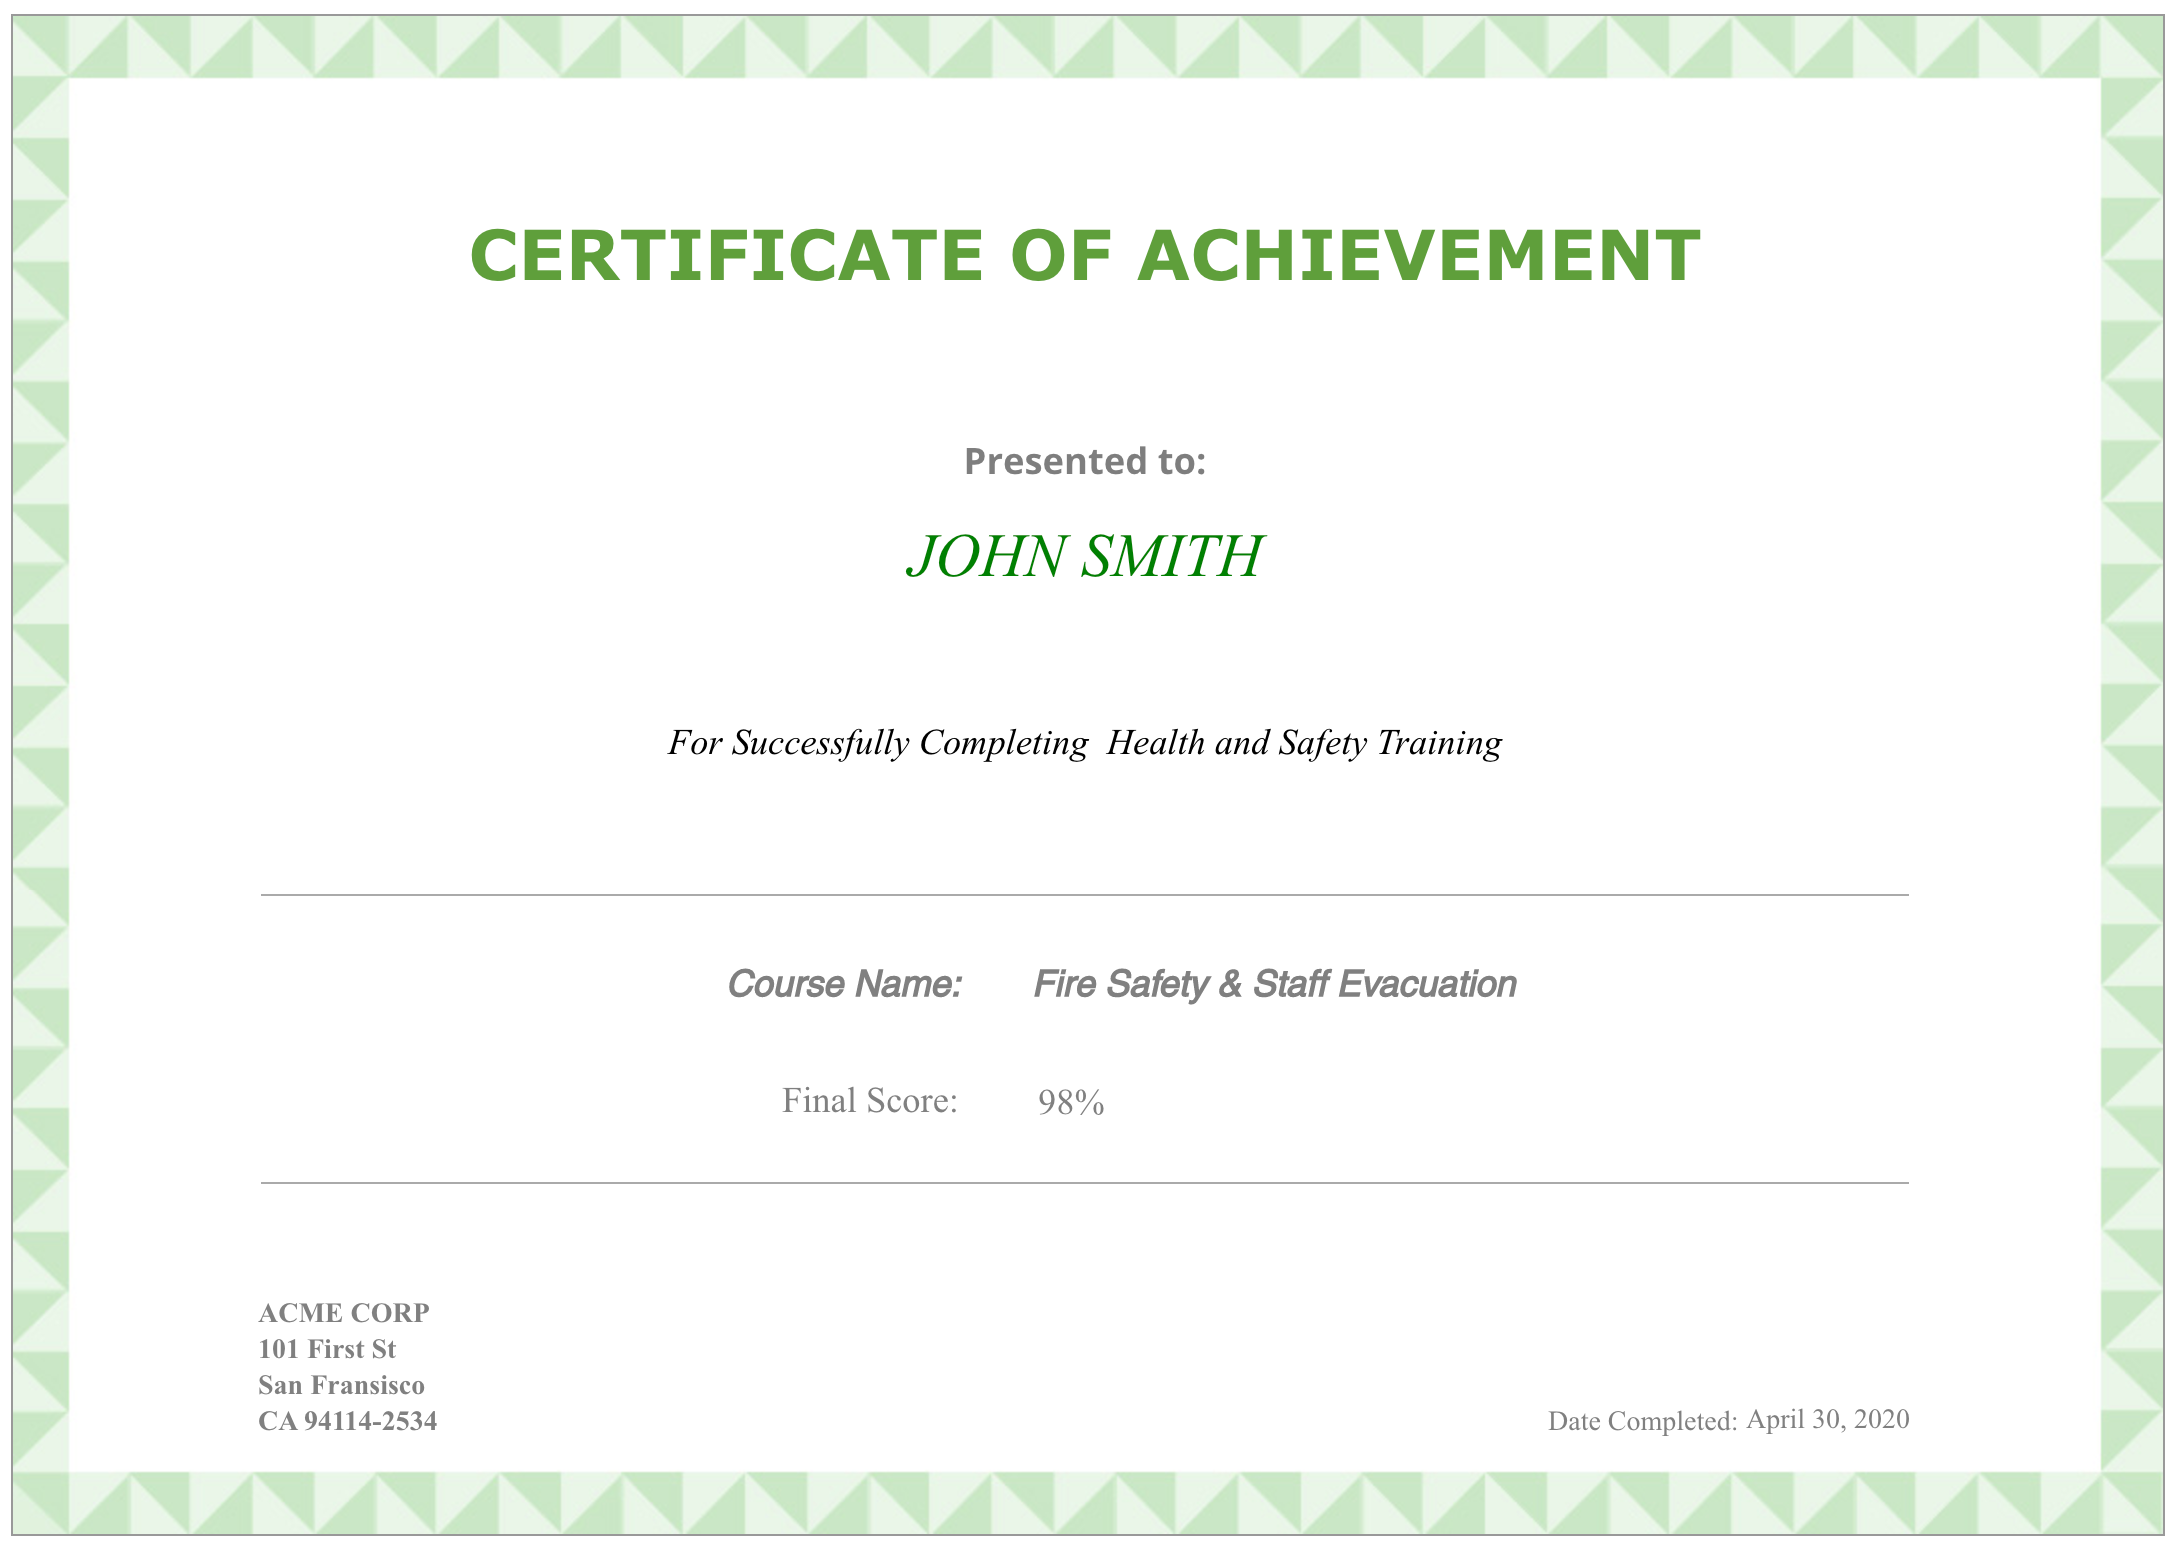
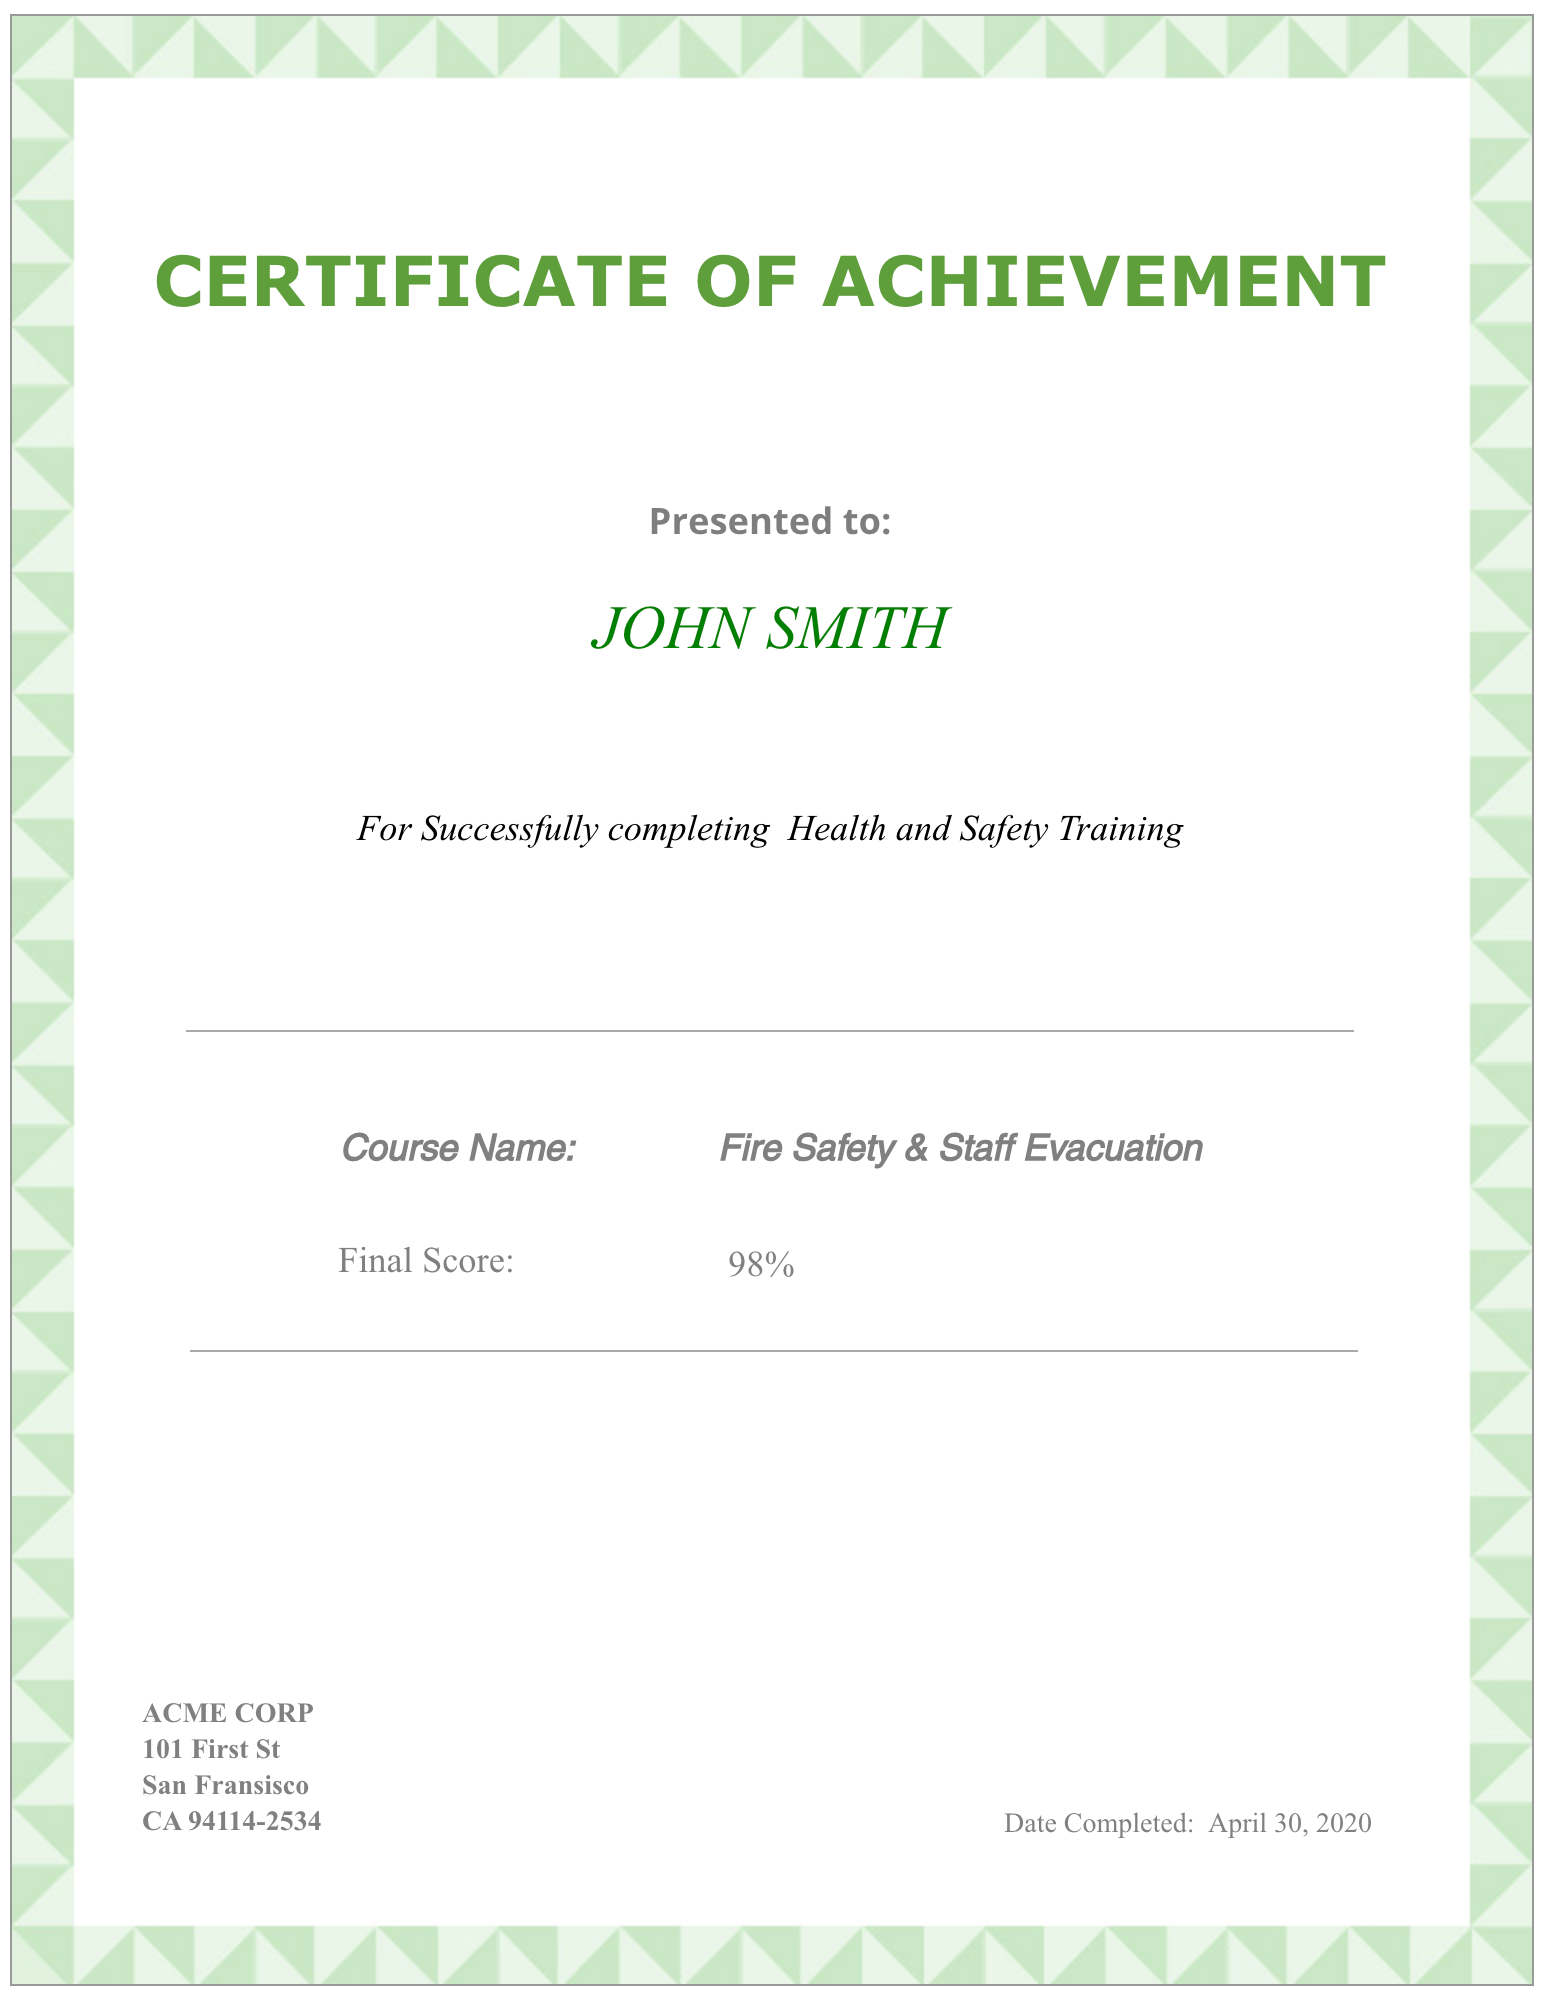
Once you have customized your certificate, you can click on ’Save Changes’ and then ‘Download .Pdf Preview’. This will allow you to preview your certificate.
Landscape:
Portrait:
You can fully brand quiz certificates, using the above features. Once you have created your certificate, you can then automate certificate quizzes by going to your Test ‘settings’ page, under the section ‘Test Completion’ > Certificates. Simply select the certificate from the drop down.
Certificates will be available on-screen, upon test completion for users to download as a .pdf or to paper. Certificate download links will also be included in emaile results , if choosing to send results via email to Test takers. Administrators and Assistants can also download Test taker certificates from the user's individual results pages.
Arabic, Chinese, Korean and Japanese characters:
Use the applicable Arabic, Chinese, Korean and Japanese font options when including these characters. Please ensure that you select these fonts for the 'Person' and 'Test' Name fields if these Character Sets will be used. Use the ‘Download .Pdf Preview’ option to verify that the characters are working correctly.
Give yourself a break this upcoming new year by using the best online Testing system that offers an easy to use interface and all of the features you will need, to create fully customized Tests and quiz certificates.
Register Here and begin using ClassMarker today. Start off with our 30 day trial that includes ALL upgraded features that ClassMarker offers.
Happy Testing!
Review Related Online Testing Blogs and Tutorials
How do I Automatically Send Quiz Results by Email?
How do I Create a Branded Quiz?
How do I Make a Quiz?
How do I Set User Roles in Quiz?