ClassMarker system at a glance

Download Icon Download the ClassMarker Essentials Guide

Question bank
Question Bank
Close
Question bank

Question Bank

  • Questions are automatically stored in your Question Bank.
  • Use categories to randomize the questions that appear in your tests.
  • Question changes are instantly applied to all tests.
Learn how
Arrow
Online Exam Settings
Apply Test Settings
Close
Online Exam Settings

Apply Test Settings

  • Pass mark
  • Restrictions / Attempts
  • Time limits
  • Availability
  • Display random questions
  • Require user info and or ID
  • Award certificates
See more options
Arrow
Create groups to register users in
Create groups of
registered users
Close
Create Groups to register users in

Create groups of registered users

  • Pre-register users,
  • or allow them to set their own username and password.
Learn how
Arrow
How to create online tests
Test is taken
Close
How to create online tests

Test is taken

  • See time left,
  • Bookmark questions,
  • Get instant feedback,
  • Get scores in real-time.
Arrow
Create custom certificates
Give custom certificates
Close
Create custom certificates

Give custom certificates

  • Choose from multiple styles and formats,
  • Drag-and-drop text and images,
  • Dynamically include scores and user data,
  • Add your signature.
Learn how
View exam results instantly
Get instant test results
Close
View exam results instantly

Get instant test results

  • By Test, group, link, question category, or user.
  • Analyze scores and Test trends.
  • Export results via CSV.
  • Share results via email.
Learn more
Page loading

On this page:

Assigning Tests via Links:

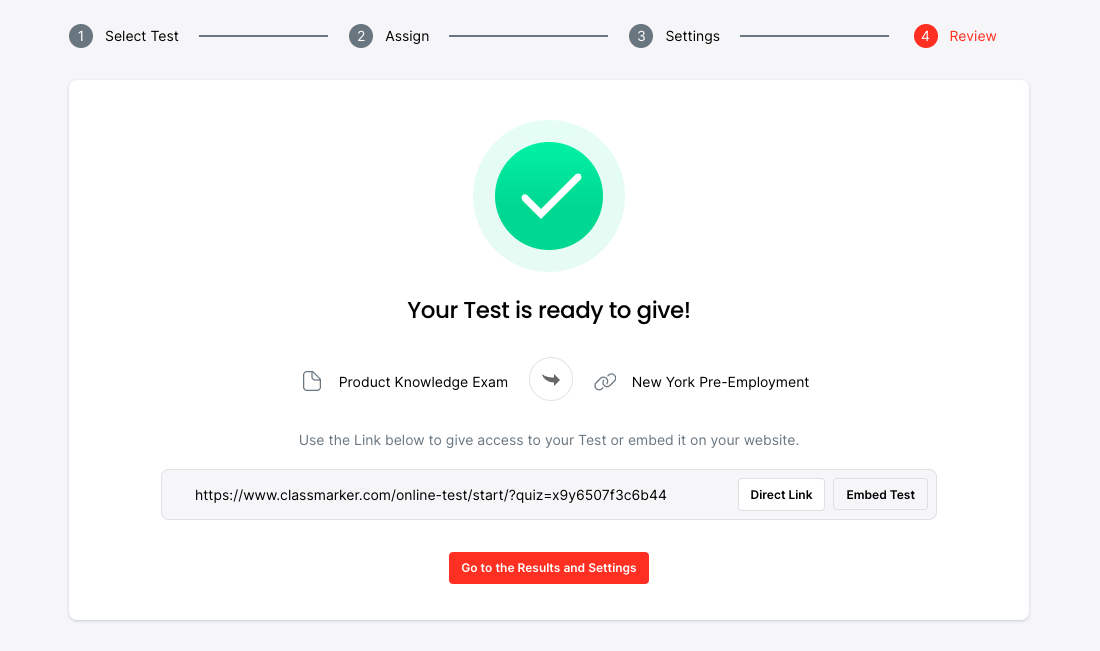
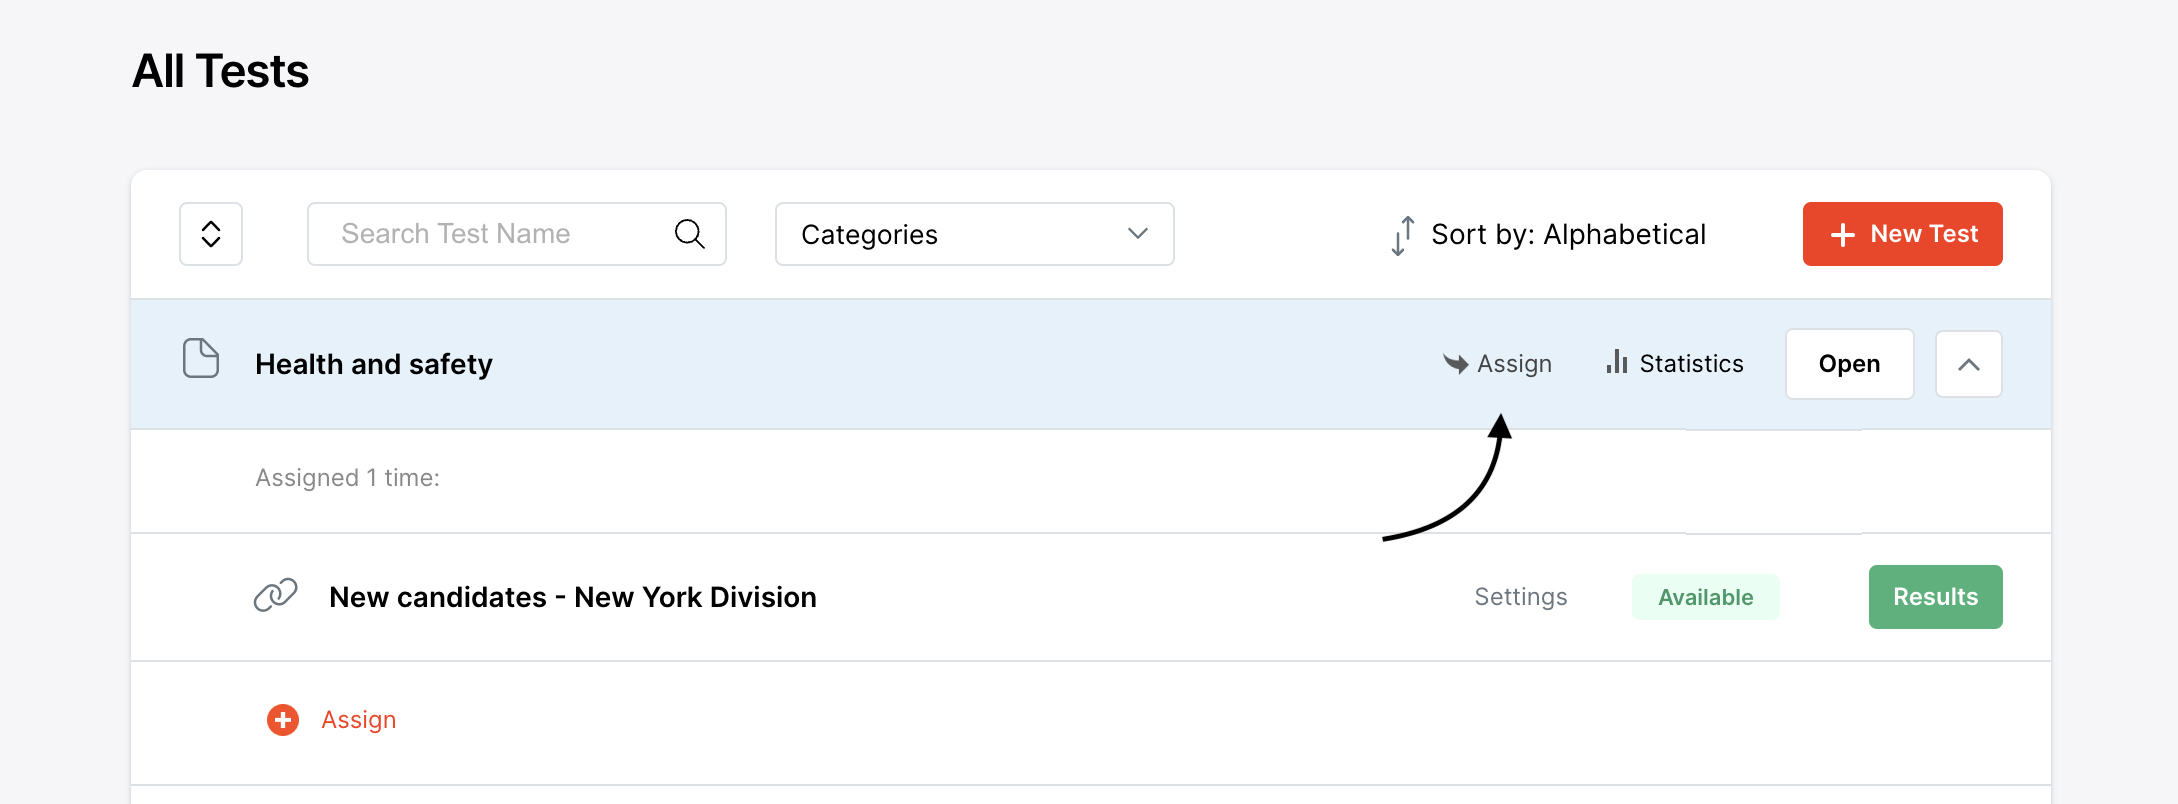
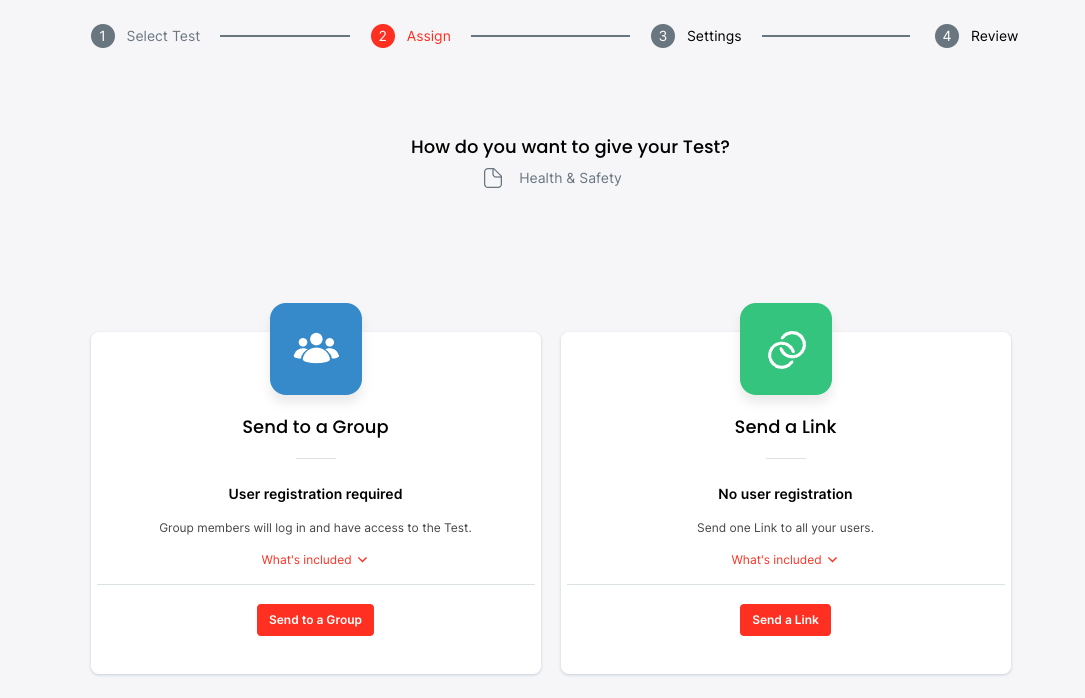
When sending your Test by Link, your Test takers will all access the Test using the same Link. Tests and Results will be independent and separate.

  1. Go to the Tests section via any of the available links on your Dashboard page.
    Screenshot
  2. Expand the Test you want to assign and click Assign.
    Screenshot
  3. On the Assign Test screen select the 'Create New Link' button.
    Screenshot
  4. Enter a Link Name. This is only for your reference, it is not seen by Test takers. Test takers will instead see the Test name when taking Tests.
    Screenshot
  5. Define your Test Settings and select 'Save'.

    Here you can require they add their Name and Email and ask custom Questions such as: What is your (Employee ID / Course Number) etc.

    You can also limit access to your Test using a password or Access List.

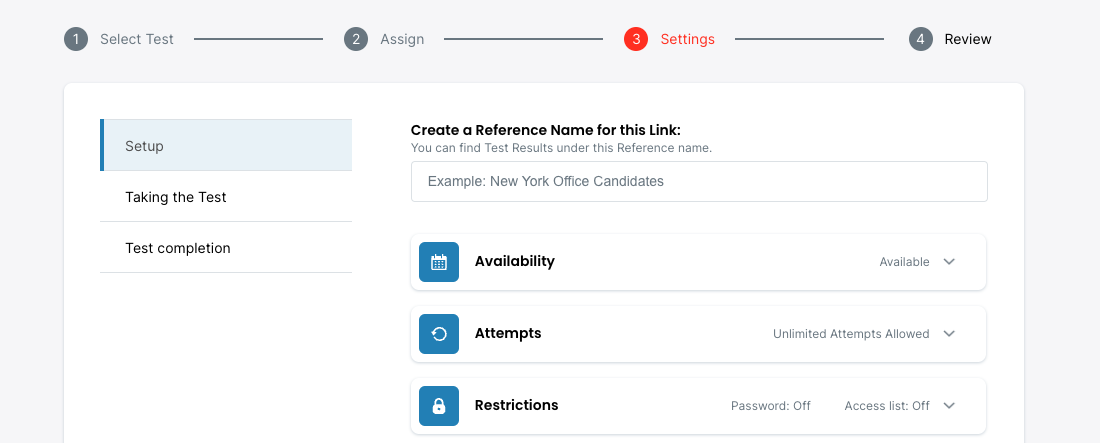
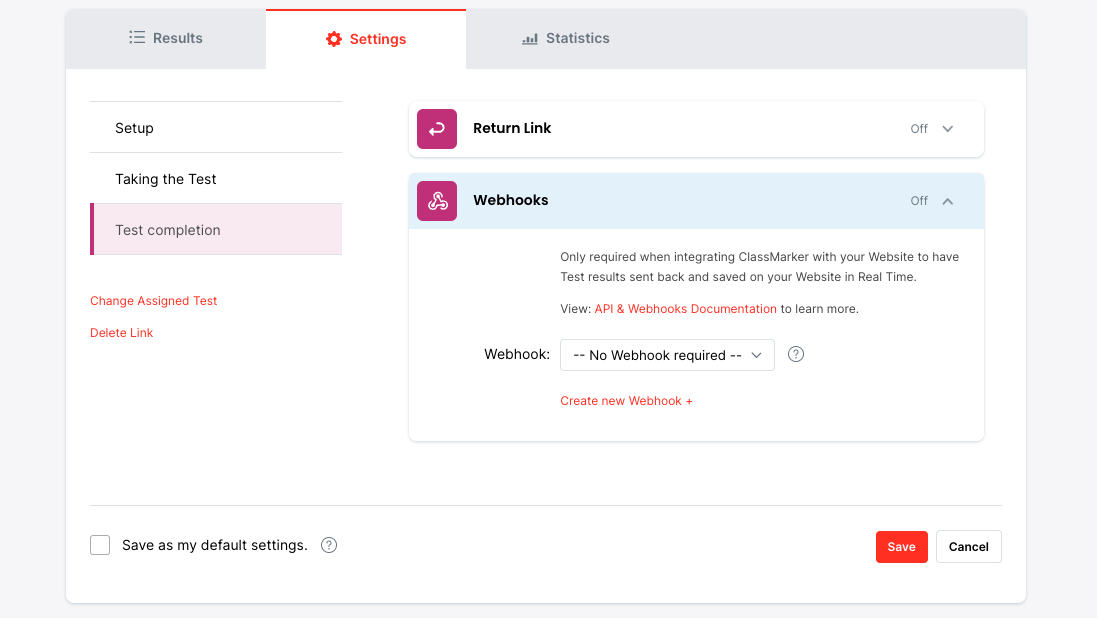
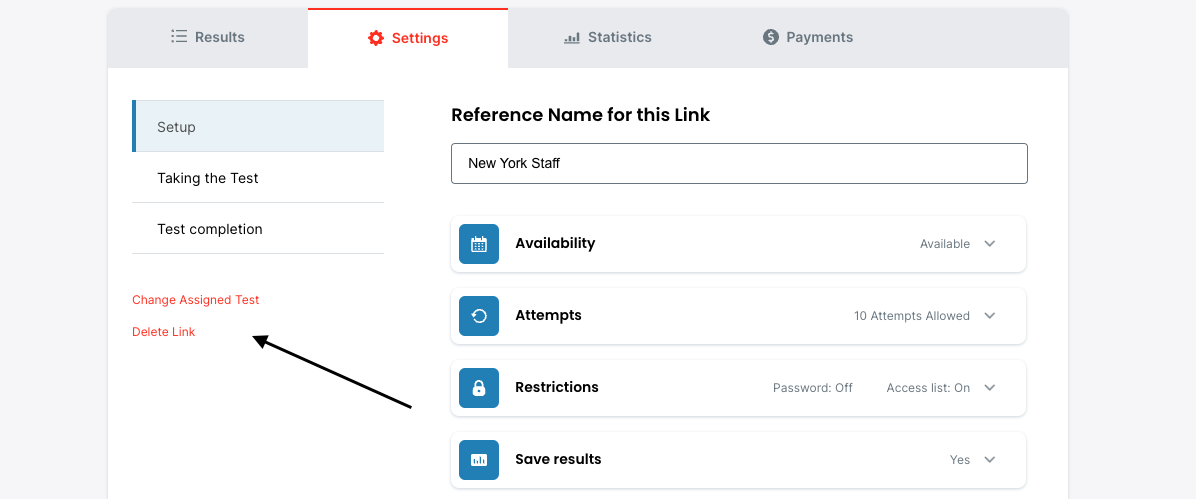
    View more Settings available to you when assigning Tests.

    Screenshot
  6. Congratulations! Your Test is now ready to be taken by your users.

    Provide access to your Test via the options provided to you under:
    Screenshot
  7. You can also edit your Links settings at any time from the Links page to change how it is given.

Change Link Assigned Settings

You can change the assigned settings for a Link at any time.

Changes will take affect immediately for the next Test taker.

  1. Go to your Links page.
  2. Select the row for the Link to expand it and select 'Settings'.
  3. Select to change the Test assigned here:
    Screenshot Screenshot

Deleting Links

  1. Go to your Links page.
  2. Select the row for the Link to expand it and select 'Settings'.
  3. Select to delete this Link here:
    Screenshot

Note: Deleting is permanent and all the results for the Link will be deleted as well! We recommend exporting results to keep an offline copy first.

Forgot password? / Register free