FAQ   User Manual  Video Help

User Manual

Quiz maker tutorials step by step.

Page loading

On this page:

Adding Members to Groups

Registered users have their own username/password and will log in via the ClassMarker.com homepage where they can access the Tests you have assigned to their Group

You have multiple options for adding members to your Groups:

Register New Members

  • Batch upload members to your Group (optionally have their login details emailed to them).
    Upload Members to Groups

  • Create and distribute registration codes to allow members to register themselves into your Group.
    Registration Codes

Transfer Existing Members between Groups

Edit Single Members Details

  1. Go to your Groups page. Screenshot
  2. Select the row for the Group to expand it and select 'Edit Group'. Screenshot
  3. Now: Select the User's row to expand it and select the 'Edit details & message' link.
  4. You can now edit and save the members name, email, password and the language their interface will be in when they log in. You can also add a private message you would like them to see when they log in.

Reset All Group Members Language & Group Access

You can easily reset all Group member settings at once:

  1. Go to your Groups page. Screenshot
  2. Select the row for the Group to expand it and select 'Edit Group'. Screenshot
  3. Select 'Member Settings'. Screenshot
  4. Follow the instruction under your selected action.

Manage Group Members Passwords & Notify All Members

You can easily reset all Group member passwords and emails all members at once:

  1. Go to your Groups page. Screenshot
  2. Select the row for the Group to expand it and select 'Edit Group'. Screenshot
  3. Select 'Member Settings'. Screenshot
  4. Follow the instruction under your selected action.

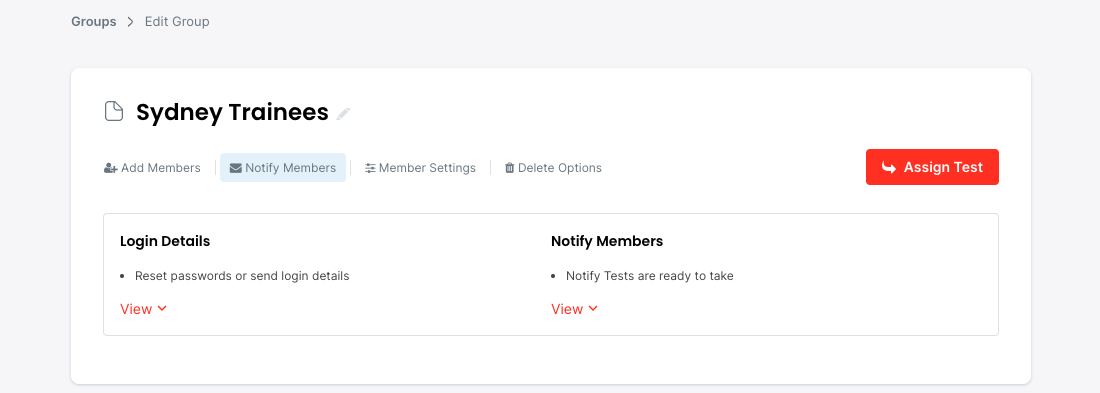
When resetting Group member passwords, you can select to choose a common password for all Group members, or have a Reset password link sent out to each Group member to reset their password with.

Export All Members Details

  1. Go to your Groups page. Screenshot
  2. Select the row for the Group to expand it and select 'Edit Group'. Screenshot
  3. On the top right of the Members table, select 'Export' link. Screenshot

Export file includes:

  • Name
  • Username
  • Email Address
  • Date Registered
  • Date of Last Login
  • Registration code

Make a Member Inactive for a Group

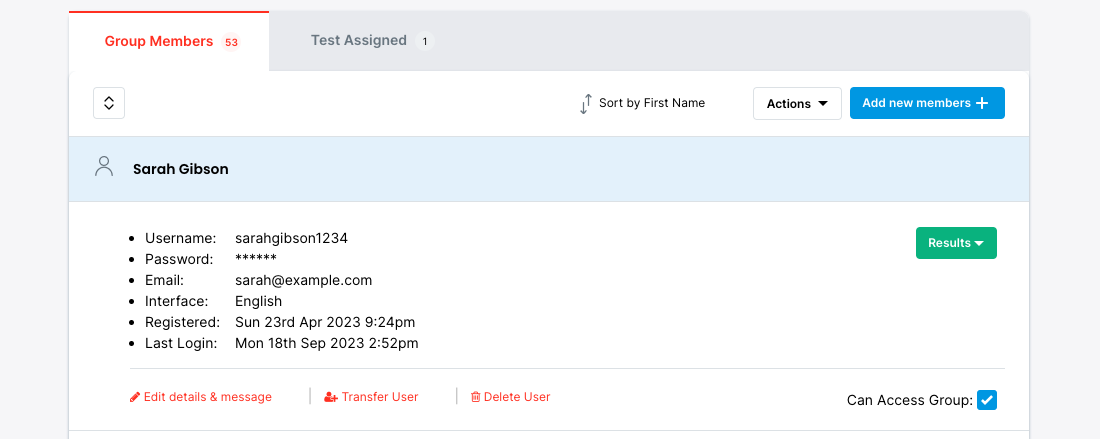
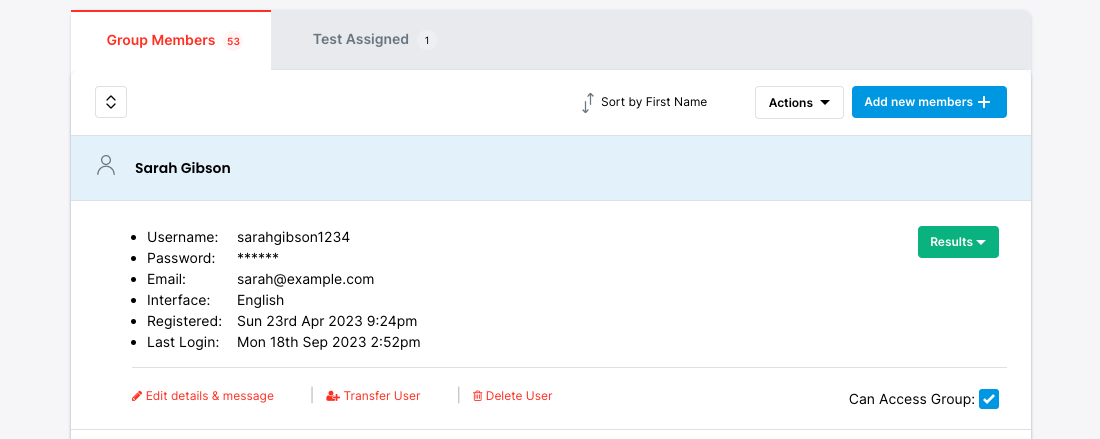
You can make a Group member inactive for one of more of their Groups. This means when the Member logs in, they will not be able to see or access the Group/s they are inactive for. This is a great way to disallow a Member from taking an exam during the timeframe you have the exam available to take.

  1. Go to your Groups page. Screenshot
  2. Select the row for the Group to expand it and select 'Edit Group'. Screenshot
  3. Select the User's row to expand it and uncheck the checkbox on the right, which reads 'Can Access Group'. Screenshot

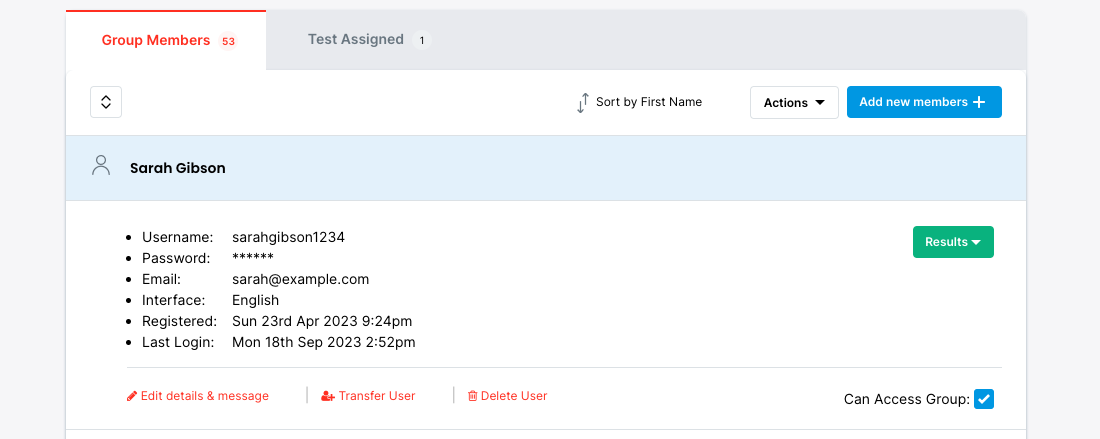
This user can now not access that Group when they next log in.

Re-check the check box when you are ready to allow access again.

Make all Members Inactive for a Group

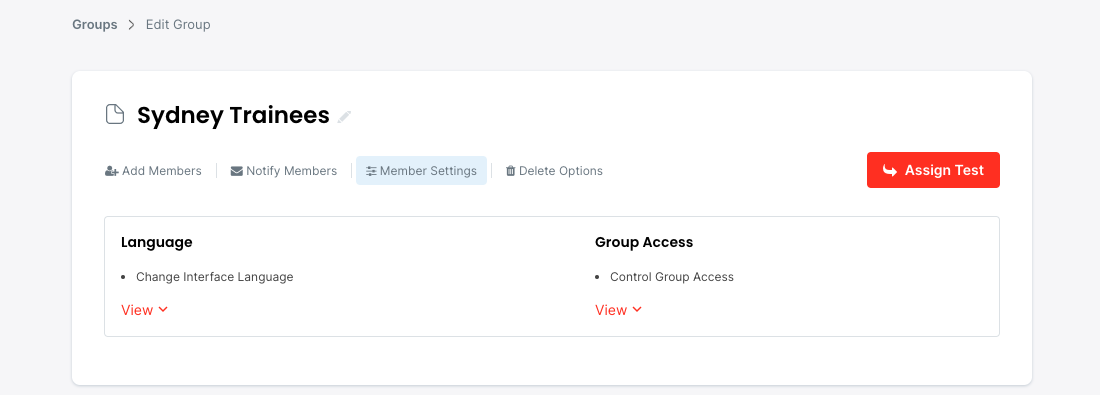
You can make all Group member inactive in a Group. This means when those Member logs in, they will not be able to see or access the Group/s they are inactive for. This is a great way to disallow all Members from accessing a Group.

  1. Go to your Groups page. Screenshot
  2. Select the row for the Group to expand it and select 'Edit Group'. Screenshot
  3. Select the 'Group Access' link and select to make all member inactive or active in the group. Screenshot

Deleting Single Members

  1. Go to your Groups page. Screenshot
  2. Select the row for the Group to expand it and select 'Edit Group'. Screenshot
  3. Select the User's row to expand it and select the 'Delete User' link and follow the instructions on the next page. Screenshot Screenshot

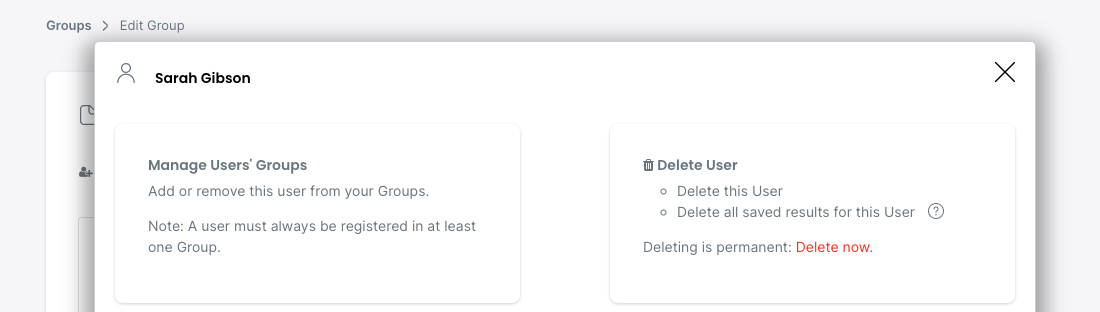
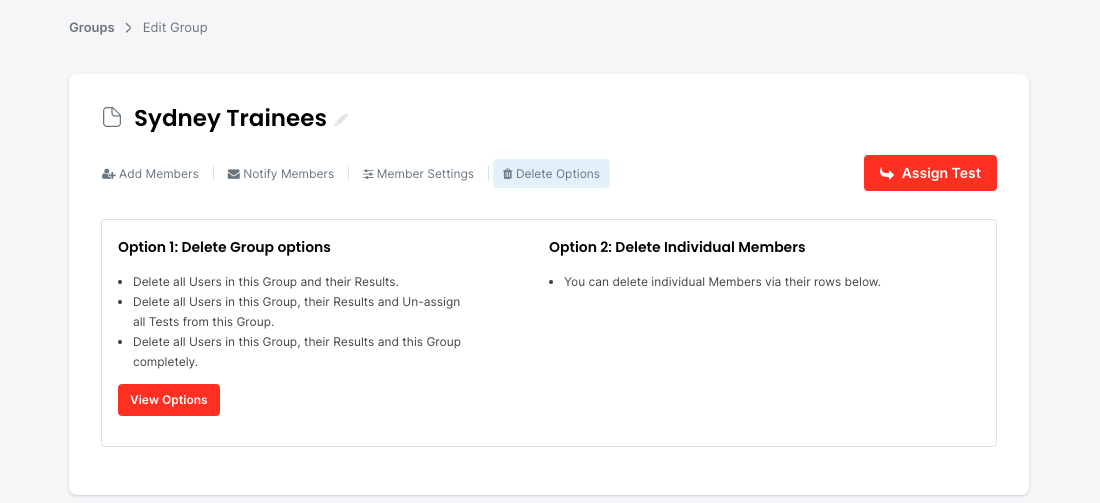
Note: Deleting is permanent and all the results for the Member will be deleted as well! We recommend exporting results to keep an offline copy first.

Deleting All Group Members

  1. Go to your Groups page. Screenshot
  2. Select the row for the Group to expand it and select 'Edit Group'. Screenshot
  3. Select 'Delete options' from the Toolbar in the Member page. Screenshot
  4. Follow the instructions for the various delete options available.
  5. Note: Deleting is permanent and all the results in that Group for all Group Members will be deleted!

Delete a Group

  1. Go to your Groups page. Screenshot
  2. Select the row for the Group to expand it and select 'Edit Group'. Screenshot
  3. Select 'Delete options' from the Toolbar in the Member page. Screenshot
  4. Follow the instructions to delete all Group members, their results and the Group itself.
  5. Note: Deleting is permanent and all the results in that Group for all Group Members will be deleted!
    If a Group member is registered to multiple Groups, they will not be deleted and they can still access their other Groups.